


Views: 0 Author: Site Editor Publish Time: 2026-10-06 Origin: Site


Up to 60% of conveyor maintenance issues stem directly from fugitive material and carryback. This operational reality severely impacts facility profitability and drastically reduces equipment lifespan. Purchasing a high-quality Belt Cleaner is only half the solution. Incorrect installation positioning inevitably leads to premature blade wear, severe belt cover damage, and entirely ineffective material discharge. Facility managers often discover that a poorly placed scraper performs worse than having no scraper at all.
A multi-stage cleaning approach is absolutely necessary for modern bulk material handling. Assessing your specific conveyor architecture dictates the precise installation points for primary, secondary, and specialty cleaners. You must map out pulley diameters, chute dimensions, and material trajectories before drilling a single hole. This guide details exactly where to mount these components to maximize carryback reduction, protect your tail pulleys, and keep your operation compliant with safety regulations.
Location Dictates Function: Primary cleaners must be mounted on the head pulley to shear off the bulk of material right at the source, while secondary cleaners belong just past the discharge point for fine scraping.
System Architecture Matters: Chute dimensions, structural beams, bearing placements, and pulley diameters strictly govern mounting options (chutewall vs. stringer) and tensioner selection.
Return Side Protection is Critical: Installing a V-shaped belt cleaner on the return run is non-negotiable for preventing material from crushing between the belt and the tail pulley.
Accessibility Equals Longevity: Cleaners installed without adequate clearance for safe, routine blade maintenance will inevitably fail due to neglect.
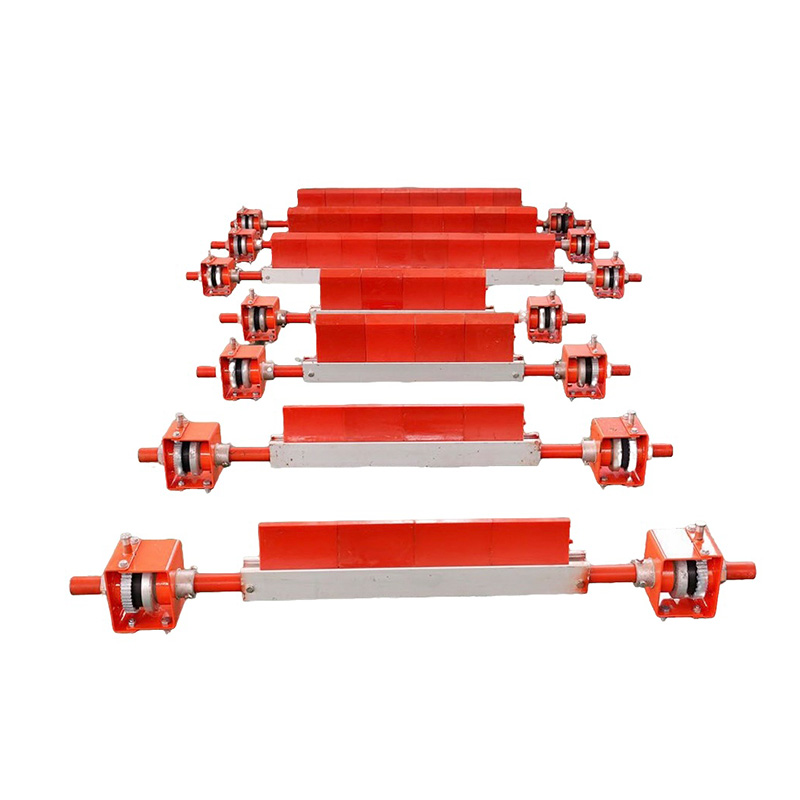
Defining a successful installation requires looking at measurable operational metrics. A correctly positioned cleaner system achieves greater than 95% carryback reduction. It operates with zero damage to the top cover of the belt. It also extends blade life significantly, reducing the frequency of replacement cycles. Achieving these metrics requires precise spatial alignment relative to the head pulley and the material discharge trajectory.
The compounding costs of incorrect placement drain maintenance budgets rapidly. When a blade sits too high on the pulley, it acts as a brake rather than a scraper. This accelerates belt wear and increases the amperage draw on the drive motor. Fugitive material that bypasses a poorly positioned cleaner drops along the return run. This material seizes return idlers, buries structural steel, and creates massive manual cleanup requirements. Labor hours spent shoveling spillage directly detract from proactive plant maintenance.
Consider the impact on return idlers. When carryback drops onto the return run, it builds up on the idler rolls. This buildup is rarely uniform. It creates an irregular, lopsided diameter on the roller. As the belt travels over these lopsided rollers, it begins to track off-center. Belt wander leads to edge damage, structural friction, and eventually, catastrophic belt failure. A single seized idler, locked up by hardened carryback, can act like a knife, slicing through the bottom cover of the belt in a matter of hours. The cost of replacing a thousand feet of conveyor belt dwarfs the cost of installing a proper cleaning system.
Let's look at the field realities of misalignment. If you mount a scraper just two inches off the optimal center point, you change the attack angle completely. The urethane blade will chatter against the belt splice. This chatter destroys the blade edge within weeks instead of months. We see this constantly in aggregate plants where installation crews eyeball the mounting brackets instead of measuring the pulley radius.
Proper cleaner installation also plays a vital role in regulatory compliance. OSHA and MSHA heavily scrutinize bulk handling facilities for combustible dust accumulations and slip, trip, and fall hazards. Spillage caused by ineffective carryback removal creates immediate safety violations. Containing material at the discharge point through optimal scraper positioning mitigates these hazards at their source. A clean conveyor walkway is a direct byproduct of a well-installed cleaning system.
Operational Metric | Optimal Installation Position | Incorrect Installation Position |
|---|---|---|
Carryback Reduction | >95% removal at the head pulley | <60% removal, massive return run spillage |
Blade Lifespan | 6 to 12 months depending on material | 2 to 4 weeks due to chatter and folding |
Belt Cover Wear | Negligible friction, smooth contact | Accelerated gouging and splice damage |
Maintenance Labor | Routine tension checks (10 mins/week) | Daily manual shoveling (2-4 hours/day) |
The primary belt cleaner, often referred to as a pre-cleaner or doctor blade, serves a highly specific function. It acts as the first line of defense, designed to remove 80% to 90% of the bulk material right at the source of carryback. This component handles the heaviest volume of material and requires a robust mounting strategy to withstand continuous impact and abrasion.
Geometry dictates the success of a primary scraper. You must mount this cleaner directly on the face of the head pulley. Position the blade just below the horizontal centerline of the pulley. It must sit directly below the main material flow. This specific placement ensures that the scraped bulk material merges seamlessly back into the main product trajectory. The material must fall directly into the discharge chute to prevent secondary spillage.
The attack angle is equally critical. Primary blades utilize a peeling action rather than a scraping action. The blade must meet the belt at an angle that allows material to slide down the face of the urethane. If you install the blade with an incorrect attack angle, the friction will cause the blade to fold under itself. This folding action rapidly degrades the urethane and creates a severe risk of catching and ripping the belt splice.
In the field, we use a simple rule of thumb for head pulley mounting. Find the exact horizontal center of the pulley shaft. Drop a plumb bob down to mark the vertical line. Your primary blade tip should contact the belt in the lower quadrant, typically 15 to 30 degrees below that horizontal centerline. This ensures the blade peels the material off while the belt is still fully supported by the steel pulley face.
The diameter of the head pulley also dictates the size of the primary blade. A massive 48-inch drive pulley requires a much larger, thicker urethane blade than a small 18-inch discharge pulley. If you put a small blade on a large pulley, the attack angle becomes too shallow, and the material will simply ride over the top of the cleaner. Always match the blade profile to the specific arc of your head pulley.
Mapping the material trajectory is a mandatory step before installation. Different belt speeds, pulley diameters, and material densities create different discharge parabolas. You must calculate this trajectory to ensure the scraped material falls cleanly into the discharge chute. If you mount the cleaner too far back, the removed material will build up on the cleaner pole and mounting brackets. This buildup eventually bridges across the chute, causing catastrophic blockages and forcing system shutdowns.
We often see installations where the primary scraper is mounted too low. The material gets scraped off, but it misses the chute lip. It falls straight down onto the floor or onto the return belt. You have to map the trajectory using the CEMA (Conveyor Equipment Manufacturers Association) guidelines. Plot the curve of your material as it leaves the belt. Your scraper must sit inside that curve, directing the flow downward into the containment area.
Conveyor architecture dictates your mounting hardware approach. You generally have two options: mounting to the chutewall or mounting to the conveyor stringer.
Chutewall Mounting: Requires bolting or welding the mounting plates directly to the steel enclosure. This provides exceptional rigidity but requires cutting inspection doors for maintenance access.
Stringer Mounting: Involves hanging the cleaner assembly from the main structural beams. This is common on open conveyors but requires heavy-duty drop brackets to prevent vibration.
Interference Mapping: You must map the exact position of structural cross-members, head pulley bearing housings, and grease lines. The mounting pole must pass through the conveyor structure without hitting these critical components.
While primary scrapers handle the bulk load, they cannot remove everything. You need a secondary belt cleaner to eliminate sticky fines, embedded dust, and residual moisture that bypass the first stage. These cleaners utilize harder materials, such as tungsten carbide, and operate under higher tension to scrape the belt completely clean.
Install the secondary scraper immediately past the point where the belt leaves the head pulley. This area is known as the return run. The belt must be completely flat and stable at this location. If the belt bounces or cups, the rigid secondary blade will cause localized wear or miss sections of the belt entirely. If the belt lacks natural tension in this zone, you must install hold-down rollers directly above the cleaner to provide a flat, stable backing.
Clearance distance between the primary and secondary units is vital. You must leave enough physical space between the two poles to prevent material from bridging. If the cleaners sit too close together, sticky fines will pack into the gap, rendering both units ineffective and creating a massive blockage inside the head chute. We recommend a minimum of 12 to 18 inches of clearance between the primary and secondary poles, depending on the cohesiveness of the material you are conveying.
Secondary cleaners do not have the solid backing of a steel pulley. They push up against the flexible rubber belt. This dynamic requires precise tensioning mechanisms to maintain consistent blade-to-belt contact.
Spring Tensioners: Provide reliable, mechanical upward force. They require routine manual adjustment as the blade wears down over time.
Air Tensioners: Utilize pneumatic cylinders to maintain constant, self-adjusting pressure. These are ideal for remote locations but require a clean, dry compressed air supply.
Cushioning: Secondary blades often feature rubber or urethane cushions at their base. This allows individual blade segments to yield to mechanical splices while maintaining contact across the rest of the belt width.
High-volume or highly viscous material systems absolutely require a dual-cleaner setup for operational viability. Handling wet clay, sticky ores, or frozen coal demands a multi-stage approach. The primary unit acts as the workhorse, shearing off the heavy, wet bulk. The secondary unit acts as the precision tool, scraping away the remaining abrasive film. Evaluating your material's moisture content and cohesiveness will dictate the specific durometer of urethane and the grade of carbide required for this paired system.
Let's talk about water. If your process involves wash plants or heavy dust suppression sprays, the material turns into a thick slurry. Standard urethane blades will hydroplane over this slurry just like a car tire on a wet road. In these wet applications, you must use a secondary cleaner equipped with a specialized squeegee blade. These blades are cut at a sharper angle and use a softer durometer urethane to break the surface tension of the water, wiping the belt completely dry before it reaches the return idlers.
In heavy mining applications, we sometimes install two secondary cleaners in tandem. The first secondary uses a heavy-duty carbide blade to knock down the stubborn fines. The second secondary uses a softer urethane squeegee blade to remove water and slurry. This triple-stage setup guarantees a dry, clean return belt, preventing slippage on the drive pulleys.
Protecting the return side of the conveyor is just as important as cleaning the carrying side. Fugitive material inevitably finds its way onto the inside (non-carrying side) of the return belt. If this material travels down to the tail section, it gets pinched between the belt and the steel tail pulley. A V-shaped belt cleaner, commonly known as a return plow, is the definitive solution for this specific problem.
The installation zone for a V-plow is highly specific. You must mount it on the inside of the return belt. Position it immediately before the tail pulley or just ahead of any gravity take-up pulleys. The plow must sit flat against the rubber, floating on the surface of the moving belt. It requires a secure tethering system to the conveyor stringers to keep it stationary while the belt glides underneath.
You want to install the plow close enough to the tail pulley to catch any material that falls off the return idlers, but far enough back to allow the deflected material to fall clear of the pulley framework. A standard distance is roughly three to five feet ahead of the tail pulley nip point.
Gravity take-up pulleys are particularly vulnerable. Because they sit at the lowest point in the conveyor system, gravity naturally pulls all fugitive material down into their housing. If a rock gets between the belt and a gravity take-up pulley, the immense tension of the counterweight forces that rock straight through the belt fabric. The V-plow acts as a physical barrier, sweeping the belt clean just inches before it enters this high-tension zone.
The geometry of the V-shape serves a distinct mechanical purpose. As the belt moves, the angled blades deflect fugitive rocks, gravel, and hardened fines laterally off the edges of the belt. This prevents the material from entering the pinch point of the pulley.
Failing to install this protection leads to severe operational failures. Trapped rocks puncture the belt carcass from the inside out. Material buildup on the tail pulley alters its diameter, causing immediate and severe belt tracking issues. The belt will wander into the conveyor structure, shredding its edges. Installing this specific conveyor belt cleaner eliminates these catastrophic risks entirely.
Tail Pulley Threat | Mechanism of Damage | V-Plow Solution |
|---|---|---|
Trapped Rocks | Punctures the belt carcass from the inside out | Deflects rocks laterally off the belt edge |
Fines Buildup | Alters pulley diameter, causing belt wander | Scrapes fines away before they reach the pulley |
Water Pooling | Causes belt slippage and hydroplaning | Channels water off the belt surface |
No two conveyor systems are identical. You must conduct a thorough structural evaluation of your existing hardware before selecting mounting brackets or tensioning systems. Scalability and compatibility depend entirely on accurate field measurements.
Begin by measuring the available footprint inside the existing head chute. You need adequate vertical and horizontal clearance to fit the main pole, the blade assembly, and the tensioning hubs. Account for the exact dimensions of the head pulley bearing standoffs. If the existing chute is too narrow, you cannot force a standard cleaner into the space.
Structural modifications are often necessary for legacy systems. You may need to cut new mounting slots into the chutewall. More importantly, you must install heavy-duty inspection doors directly adjacent to the planned installation site. Without these doors, maintenance crews cannot safely inspect the blades, clear blockages, or perform routine tension adjustments.
When dealing with abrasive materials like crushed granite or iron ore, the structural integrity of the mounting brackets becomes even more critical. The constant impact and friction transfer immense kinetic energy into the cleaner pole. If the stringers are weak or corroded, this vibration will literally tear the mounting bolts out of the steel. We always recommend reinforcing the chute wall with quarter-inch steel plating before welding the mounting hubs into place. This extra step takes an hour during installation but prevents catastrophic failure six months down the road.
The physical condition of your belt heavily influences cleaner selection and installation parameters. You must identify the type of belt splice running on your system.
Vulcanized Splices: These smooth, seamless joints allow for aggressive cleaning. You can install rigid tungsten carbide blades with high tension without fear of snagging.
Mechanical Fasteners: Metal clips and rivets require specialized urethane blades. You must install relief mechanisms in the tensioner to allow the blade to bounce slightly as the metal fasteners pass, preventing the cleaner from ripping the splice out of the belt.
Belt Speed: High-speed belts generate significant friction and heat. You must select high-temperature urethane formulations and ensure the mounting pole is engineered to withstand severe vibrational harmonics.
When evaluating installation strategies, weigh the trade-offs between retrofitting standard equipment and engineering custom solutions. Standard mounting brackets are cost-effective but may force you into a sub-optimal attack angle due to structural interference. Engineering custom offset brackets or extended mounting poles requires a higher initial investment but guarantees optimal bearing clearance and perfect blade geometry. The long-term savings in extended blade life and reduced belt wear always justify the cost of custom mounting hardware.
Even the highest quality cleaning systems fail rapidly if installed poorly or maintained improperly. Understanding implementation risks allows you to mitigate them during the initial setup phase.
Over-tensioning is the most common installation error. Maintenance crews often apply excessive pressure to compensate for a poorly positioned blade or a worn-out urethane edge. This excessive force generates massive friction. The heat can actually melt the urethane blade onto the belt cover. Furthermore, over-tensioning creates severe motor drag, increasing energy consumption and potentially tripping electrical breakers.
Incorrect attack angles cause destructive mechanical chatter. If you install a cleaner too high or too low on the pulley radius, the blade will skip and bounce against the rubber. This vibration translates down the mounting pole, fatiguing the steel brackets and eventually causing catastrophic structural failure of the cleaner assembly. You must strictly adhere to the manufacturer's specified mounting coordinates to ensure smooth, continuous contact.
Another major risk is ignoring the belt's wear profile. Older belts often develop a cupped shape or have deep gouges in the center. If you install a rigid, straight blade against a cupped belt, the cleaner will only contact the outer edges. The center will remain completely untouched, allowing a thick ribbon of carryback to pass right through. To mitigate this, you must use segmented blades that can independently adjust to the contours of a worn belt. Each segment sits on its own urethane cushion, ensuring uniform contact pressure across the entire width of the belt, regardless of surface irregularities.
A cleaner that cannot be reached will not be maintained. You must design your installation layout with ergonomics and safety at the forefront. Cleaners must be installed in locations that allow for strict Lockout/Tagout (LOTO) compliance.
Position the tensioning mechanisms on the outside of the chute, at a comfortable working height for a technician standing on a permanent walkway. Utilize track-mounted or slide-out cleaner poles whenever possible. These systems allow a single technician to slide the entire blade cartridge out of the chute for rapid changeouts, completely eliminating the need for hazardous confined space entry.
Schedule a professional site survey to map out exact installation coordinates for your head and tail pulleys.
Audit your existing chutes to determine if inspection doors or structural modifications are required for safe access.
Identify your belt splice types to ensure you specify the correct blade materials and tensioning relief mechanisms.
Standardize your tensioning protocols to prevent maintenance crews from over-pressurizing the blades.
A: A primary cleaner mounts directly on the head pulley to peel away 80-90% of the heavy bulk material. A secondary cleaner installs further back on the return run, pressing against the flat belt to scrape away sticky fines, dust, and residual moisture that bypass the first stage.
A: It is highly discouraged in heavy-duty applications. Without a primary unit, the secondary cleaner will be instantly overloaded by bulk material, causing rapid blade wear and severe chute blockages. It is only acceptable in very light-duty applications handling dry, non-cohesive materials.
A: You must mount a V-shaped cleaner on the non-carrying side (the inside) of the return belt. Position it immediately preceding the tail pulley or gravity take-up pulley to deflect fugitive material before it gets pinched and damages the belt.
A: Correct tension is determined by manufacturer specifications based on blade width and material type. Visually inspect the blade-to-belt contact; it should be firm and continuous without causing the belt to cup, drag, or generate excessive heat.
A: Yes. Mechanical splices require urethane blades and tensioners with mechanical relief to allow the blade to bounce over the fasteners. Vulcanized splices allow for rigid tungsten carbide blades and higher tension settings without the risk of snagging.
A: You generally need 6 to 12 inches of clearance below the horizontal centerline of the head pulley, depending on the pole diameter and tensioner size. You must also account for bearing standoffs to ensure the mounting pole can pass completely through the chute walls without interference.


